Depth Peeling Order Independent Transparency in Vulkan
Matthew Wellings 27-Jul-2016
Depth peeling is an accurate order independent transparency solution that involves rendering a scene multiple times and each time ‘peeling away’ layers of the image in depth order. There is nothing new about this technique, it was first described by Abraham Mammen back in 1989 "Transparency and antialiasing algorithms implemented with the virtual pixel maps technique". There is also a good description in Cass Everitt’s well cited “Interactive Order-Independent Transparency” [2001].
It has been mentioned online that Vulkan can make depth peeling faster because of its reusable command buffers. In this post I will briefly explain how to perform depth peeling in Vulkan using command buffers while also taking advantage of subpasses and input attachments.
Everitt’s paper contains some psudo-code that describes the method using two depth buffers. One of these buffers is read-only and the other is read-write. In 2001 this was not supported by OpenGL so he implemented the method using shadow maps. With Vulkan we can still only have one fixed function read-write depth buffer but we can also have another depth buffer as an input attachment and use this to test and discard fragments during each peel.
To summarise the depth peeling process we will be rendering the scene multiple times. The first time that we render it we will produce an image in much the same way as a regular depth tested scene is drawn, we can call this our first layer, which is stored in an off-screen buffer. When we come to drawing the next layer things are done a little differently. This layer should only show us surfaces that are the front most surface immediately behind those drawn in the previous layer. To achieve this we will perform a regular depth test and write on a new cleared depth buffer as well as a second depth test against the previous layer's written depth buffer. We can render as many layers as we deem necessary and blend the results to the final framebuffer using a regular order-dependent blend algorithm.
More info about the depth peel algorithm can be found in Everitt’s paper.
Input attachments
Input attachments are a very important feature of Vulkan from a performance perspective, especially on tile based deferred renders (PowerVR, Mali & Adreno). TBDRs only render a small area of the framebuffer image at a time. This gives these chips the ability to store per-pixel temporary values in fast on-chip registers rather than having to write them back to main memory to be retrieved later. This functionality was exposed in OpenGL as the Pixel Local Storage extension. This per pixel storage can be persisted through the rendering of an entire frame. It is as if we have an image, the same size of the framebuffer, that we can perform very fast IO on and this is exactly how Vulkan exposes it. An input attachment is a vkImage that must be the same size as the framebuffer, it lasts throughout the render pass (during which we cannot change frame-buffer) and can be set up to be discarded at the end of the render pass (so never gets written to graphics RAM and does not consume memory bandwidth). Unlike the PLS extension in OpenGL, input attachments should work on all desktop GPUs as well (although, as immediate renderers, desktop GPUs cannot take advantage of on chip registers and must write to graphics memory to store even temporary values).
There will be a limit to how many input attachments we can have before we may lose some of the speed benefits. For this reason this demo uses only one 'peel buffer' and blends this into the final buffer after each peel.
Under blending
This implementation uses front to back peeling, this allows us to ensure that the front-most details are correctly rendered but allow us to abandon those that are behind too many layers to be noticed (alternatively these layers could be rendered using a different technique). Because of this front to back approach and having a single peel buffer the layers cannot be blended with the Porter-Duff equation but must instead be blended using an under-blending equation. Use of the under-blending equation can be implemented under Vulkan in the same way as you would under OpenGL.
Under blending requires us to multiply colour values by alpha in the shader before using fixed function blending.
The pipelines
This demo can display a split-screen with traditional unsorted order-dependent blend (left side) and depth-peeled blend (right side) for comparison. There is a 'traditional' pipeline and a set of secondary command buffers for the traditional blend (one secondary command buffer for each swap-chain image). This pipeline also includes a simple scissor for keeping everything on the left.
For the depth-peel itself there are three pipelines, a peel pipeline, a blend pipeline and a first peel pipeline. The peel pipline uses a shader that reads the depth buffer as an input attachment, performs an in-shader depth test (grater than) and either discards the fragment or outputs the colour & alpha. The pipeline will then use a fixed function depth test (depthCompareOp =VK_COMPARE_OP_LESS_OR_EQUAL) and if that passes write the colour including the alpha (without blending) to the 'peel buffer'. The depth will be written to the depth buffer used by the fixed function depth test, the buffer used by the shader depth test will be read-only. The two depth buffers will be swapped for each new layer that we peel.
Peel pipeline fragment shader:
#version 400
#extension GL_ARB_separate_shader_objects : enable
#extension GL_ARB_shading_language_420pack : enable

layout (input_attachment_index=0, set=2, binding=0) uniform subpassInput subpass;
layout (location = 0) in vec4 color;
layout (location = 0) out vec4 outColor;

void main() {
   float depth = subpassLoad(subpass).r;
   if (gl_FragCoord.z <= depth)
    discard;
   outColor = color;
}
The blend pipeline uses a shader that reads the peel buffer that we wrote to during the peel stage and blends these values to the final frame-buffer. When this pipeline is used a single rectangle is drawn so that the fragment shader is run for every pixel in the frame-buffer. The fragment shader reads the peel buffer an input attachment and then multiplies the R,G & B channels by the alpha (this is the first step of the underblend):
#version 400
#extension GL_ARB_separate_shader_objects : enable
#extension GL_ARB_shading_language_420pack : enable

layout (input_attachment_index=0, set=2, binding=0) uniform subpassInput subpass;
layout (location = 0) out vec4 outColor;

void main() {
   vec4 color = subpassLoad(subpass);
   outColor = vec4(color.r*color.a, color.g*color.a, color.b*color.a, color.a);
}
This pipeline then has the following blend state to complete under-blending in the fixed function blend stage:
VkPipelineColorBlendAttachmentState att_state[1];
att_state[0].colorWriteMask = 0xf;
att_state[0].blendEnable = VK_TRUE;
att_state[0].alphaBlendOp = VK_BLEND_OP_ADD;
att_state[0].colorBlendOp = VK_BLEND_OP_ADD;
att_state[0].srcColorBlendFactor = VK_BLEND_FACTOR_DST_ALPHA;
att_state[0].dstColorBlendFactor = VK_BLEND_FACTOR_ONE;
att_state[0].srcAlphaBlendFactor = VK_BLEND_FACTOR_ZERO;
att_state[0].dstAlphaBlendFactor = VK_BLEND_FACTOR_ONE_MINUS_SRC_ALPHA;
The first time a peel is rendered we must not perform an in-shader depth test as we would be trying to render only surfaces we have already draw but we have yet to draw any. An alternative approach to having this first peel pipeline would be to use the standard peel pipeline, allow the in-shader test to occur, but have the depth buffer cleared to 1 rather than 0. Having an extra pipeline in Vulkan should be cheap and would save on a frame-buffer clear and the read and compare opps. The first peel pipeline is the same as the regular peel pipeline but uses the fragment shader from the traditional blend pipeline which happens to be exactly what we need for this. Also it is marked as being for subpass 1, not subpass 3, to ensure correct compatibility.
Subpasses
Each time you want to change which buffer you are rendering to and which you are using as the current input attachment you will need to use a new subpass. We use two subpasses for each layer of the peeling process. We also have a subpass for the traditional render (when in split-screen). All of these subpasses must exist within one renderpass, if they do not then we will lose the advantages of using subpasses and input attachments e.g. the temporary buffers may have to be flushed to main RAM. We also need to define subpass dependencies as all stages of the depth peel are dependent on the results of previous stages. It is when we define the subpasses that we set out which images will be used as render buffers, which are used as input attachments and which are preserved. It is here we define that our depth buffers are alternated between layers.
The depth buffers
The depth buffers must have sufficient resolution or what can best be described as a form of inter-layer depth fighting will be visible with bands appearing on all surfaces that are not at a uniform depth, i.e. are at an angle to the camera. For this demo I have chosen a depth format of VK_FORMAT_D24_UNORM_S8_UINT as it offers sufficient precision and is supported on many platforms.
Command buffers
Secondary command buffers are created for each swapchain image and for each depth peel layer. This is because the secondary command buffer must specify the framebuffer and subpass it is to be used within its VkCommandBufferInheritanceInfo. For a four layer peel on a triple buffered swapchain we will need 2 (peel and blend) x 4 (layers) x 3 (swapchain images) = 24 secondary command buffers. We have to place our draw calls into command buffers 12 times! If you need to rebuild your command buffers for each frame you will need to issue your draw calls once for each layer (in each frame). We would be able to get around this limitation if we used a new renderpass for each layer, this is because the renderpasses would all be considered compatible with the one command buffer (sadly there is no such concept of subpass compatibility). Using separate renderpasses would however mean that we loose the advantages of subpasses which have the potential to be considerable on TBDRs.
In this demo, and hopefully many practical use-cases, there is no need to rebuild the command buffers as the scene changes as we will still be benefiting from pre-recorded command buffers.
Render loop
As should be the case with a Vulkan app there is little to do in the main render loop. In this demo a primary command buffer is created each time a frame is drawn, you can make these during setup though. In this command buffer we add only vkCmdExecuteCommands for the correct secondary command buffer and vkCmdNextSubpass. Then submit this commandbuffer to the queue.
Full code for this demo can be found on GitHub.
Prebuilt APKs are also available.
The results
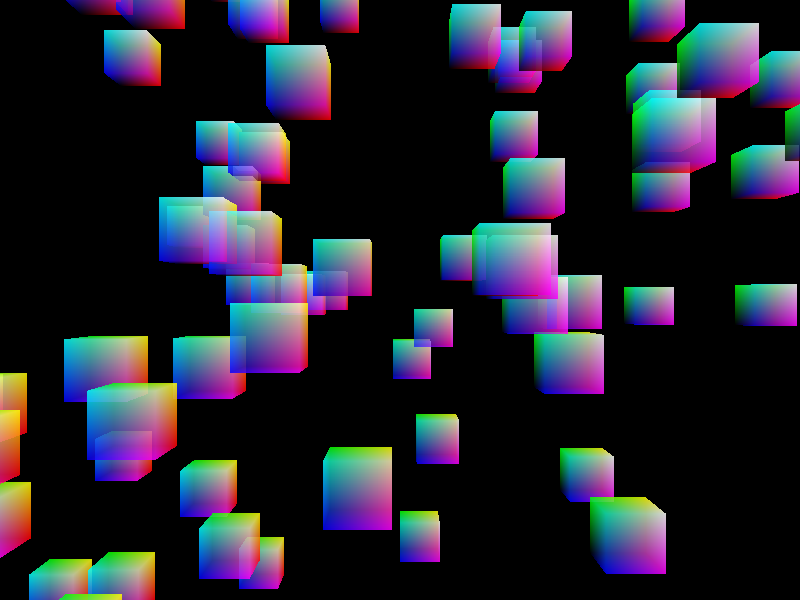
This image shows 100 equally sized cubes rendered using a 4-layer depth peel. All blocks are the same size and rendered in arbitrary order in separate draw calls.
Desktop
This demo works correctly on Nvidia and AMD. It will draw 500 cubes, each with a separate draw-call, with 4 layers at 60fps on a GeForce GT 640.
With presentMode set to VK_PRESENT_MODE_IMMEDIATE_KHR the following performance results where obtained. This was with a GTX 660 Ti (1200Mhz graphics clock) in a v1 PCIe x16 (2.5 GT/s) slot using driver version 364.19 on Linux (KDE 4 with compositor turned off) at 1920x1080:
| Blocks | Layers | FPS | Gpu Utilisation | PCIe Utilisation |
| 100 | 4 | 740 | 97% | 10% |
| 250 | 4 | 537 | 98% | 18% |
| 500 | 4 | 395 | 98% | 26% |
| 1000 | 4 | 209 | 99% | 33% |
| 2000 | 4 | 132 | 99% | 37% |
| 100 | 8 | 413 | 98% | 9% |
| 250 | 8 | 292 | 99% | 20% |
| 500 | 8 | 212 | 99% | 28% |
| 1000 | 8 | 115 | 99% | 33% |
| 2000 | 8 | 66 | 99% | 37% |
Mali
The Mali GPU in the Galaxy S7 & S7 Edge is able to render this demo correctly but only the first frames appear on the screen played back in a loop. This could be a problem with the swapchain in my demo. A problem with the swapchain should not be surprising as the driver states that it does not support the VK_KHR_swapchain extension. Without this extension it should not be possible to display anything to the screen with Vulkan. I do not currently have physical access to either of these phones. I used the Samsung Test Lab which makes identifying the exact cause of the problem difficult, this may be resolvable.
PowerVR
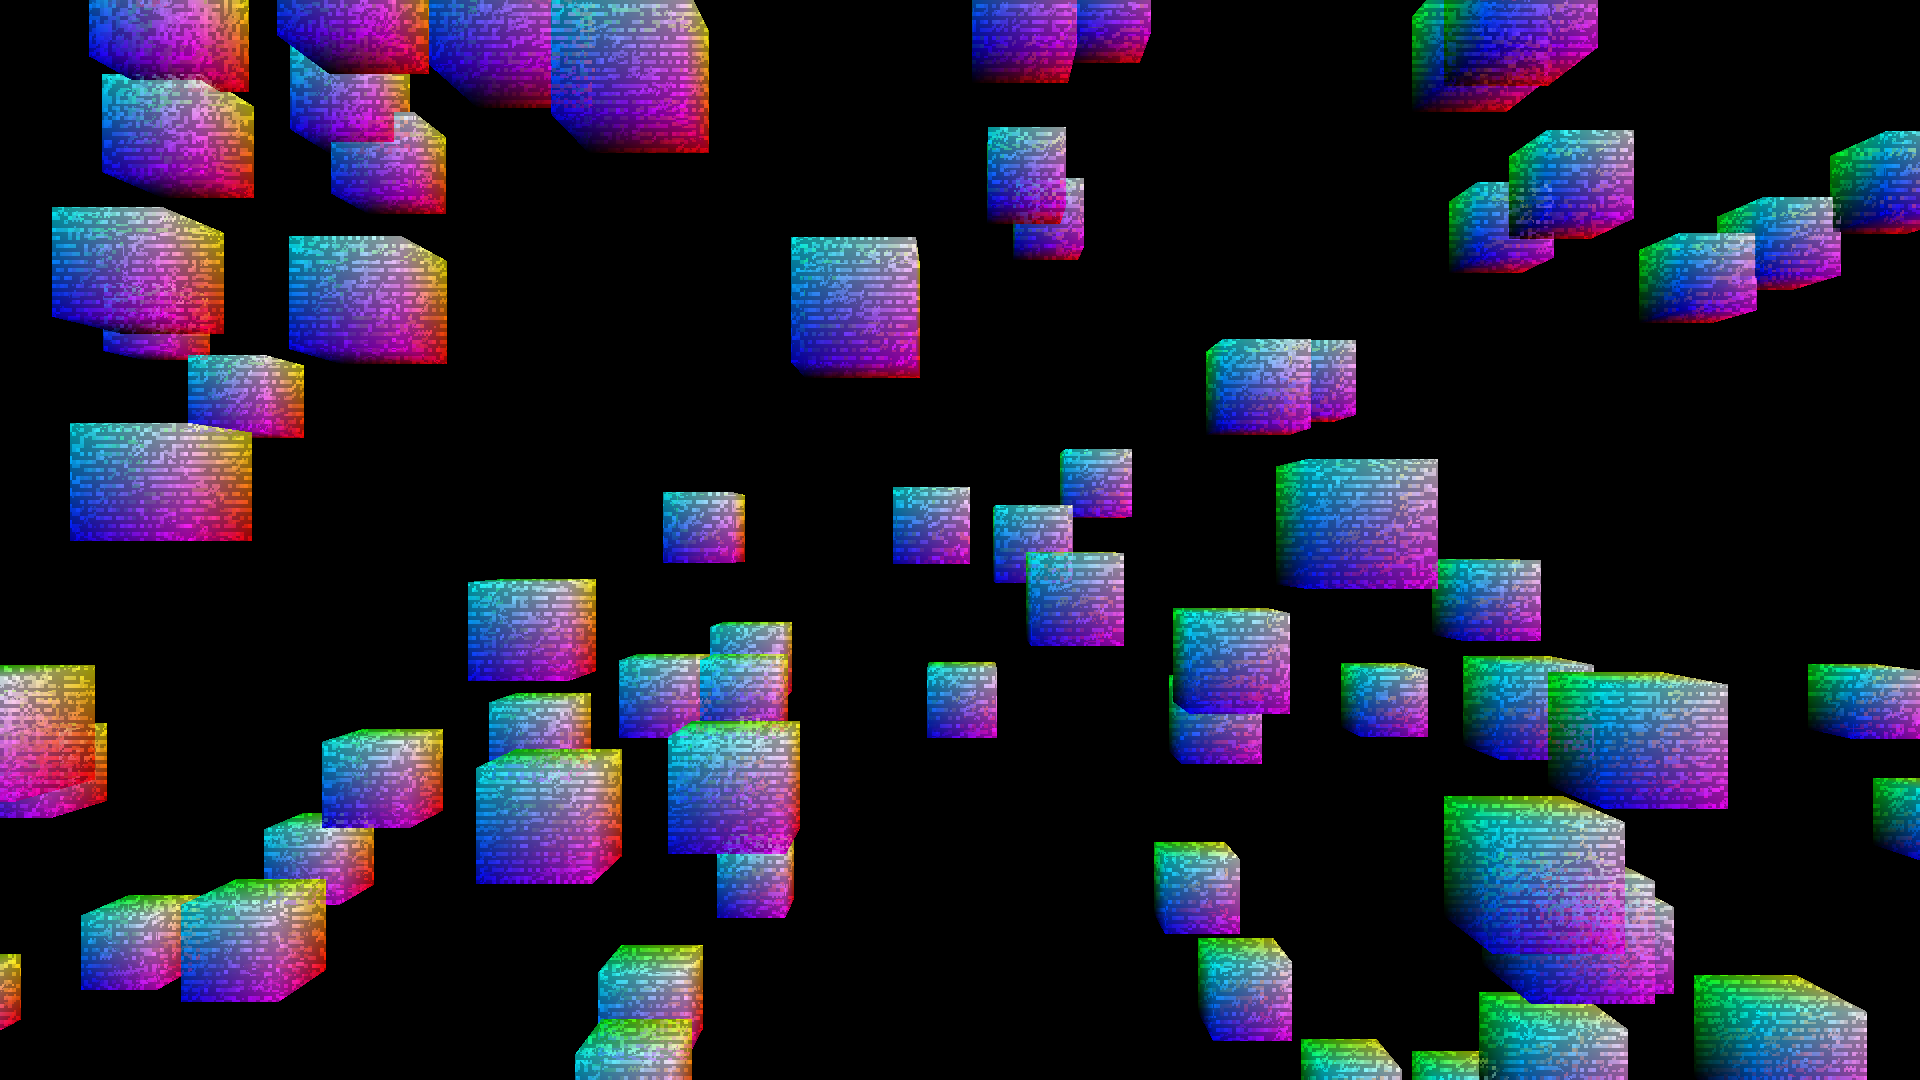
This demo will not run correctly on the Nexus Player (Imagination's recommended Vulkan dev device). The demo will load and render but it seems that the depth buffer is not being read correctly by the shader. The screenshot below shows the noise that results.
If you ask for only one layer to be used (press down three times) the scene is rendered perfectly. This suggests that PowerVR has no problem reading colour buffers as input attachments, just depth buffers.
Update: ImgTec have acknowledged that this is a driver bug and have said they are working on a fix.
Adreno
This demo will not run at all on the Nexus 5X (Android 7 Preview). As soon as a pipeline that uses a shader that reads input attachments is created the vkCreateGraphicsPipelines function returns VK_INCOMPLETE. This value is not an error but it is the value that should be returned by queries where the given array size is insufficient, using it like this is against the spec. vkCreateGraphicsPipelines will set the pipeline null in this case, no pipeline is actually created.
Update: This has now been fixed and this demo works correctly on the Nexus 5X (Android 7.1 Preview).
Tegra
This demo works correctly on the Nvidia Tegra K1 (SHIELD tablet).
Further Reading
Interactive Order-Independent Transparency Cass Everitt, 2001
Transparency (or Translucency) Rendering Nvidia Corporation
Tiling positive or how Vulkan maps to PowerVR GPUs Tobias Hector - Imagination
Comments
Show Comments (Disqus).
Stats
Loading stats...
Matthew Wellings - Blog
Follow @WellingsMattDepth Peeling Pseudo-Volumetric Rendering 25-Sept-2016
Depth Peeling Order Independent Transparency in Vulkan 27-Jul-2016
The new Vulkan Coordinate System 20-Mar-2016
Improving VR Video Quality with Alternative Projections 10-Feb-2016
Playing VR Videos in Cardboard Apps 6-Feb-2016
Creating VR Video Trailers for Cardboard games 2-Feb-2016
Playing Stereo 3D Video in Cardboard Apps 19-Jan-2015
Adding Ray Traced Explosions to the Bullet Physics Engine 8-Oct-2015