Playing Stereo 3D Video in Cardboard Apps
Matthew Wellings 19-Jan-2016
Now that Google Cardboard has become very popular very quickly it is desirable to play stereo 3D video in apps and games built for Google Cardboard.
The effect achieved here is to display a virtual TV/cinema screen in the VR world which is showing a 3D film as if we were looking at a real screen with while wearing 3D glasses.
The video used here has the image to be seen by the left eye placed above the image to be seen by the right eye. We must render the top half of the video as a textured rectangle in the scene seen by the left eye and vice-versa.
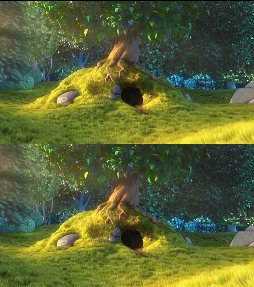
© 2008 Blender Foundation
3D © 2013 Janus B. Kristensen
Playing video in Android Java & NDK OpenGL app & games has been possible to achieve since API level 11 with quite impressive results and relatively little work thanks to the SurfaceTexture class. This class allows you to use the standard MediaPlayer class in Android to render video into a usable OpenGL texture.
MediaPlayer is the recommended way to play videos as it will have been set up by the devices' SoC manufacturer to automatically take advantage of hardware accelerated decoding where available.
Playing video in a GL scene requires us to first set up a texture for the video to render to and pass the texture ID to a new SurfaceTexture. Notice the texture is a GLES11Ext.GL_TEXTURE_EXTERNAL_OES:
//Setup the video texture
int[] textures = new int[1];
GLES20.glGenTextures(1, textures, 0);
videoTextureID = textures[0];
GLES20.glBindTexture(GLES11Ext.GL_TEXTURE_EXTERNAL_OES, videoTextureID);
GLES20.glTexParameterf(GLES11Ext.GL_TEXTURE_EXTERNAL_OES, GLES20.GL_TEXTURE_MIN_FILTER, GLES20.GL_LINEAR);
GLES20.glTexParameterf(GLES11Ext.GL_TEXTURE_EXTERNAL_OES, GLES20.GL_TEXTURE_MAG_FILTER, GLES20.GL_LINEAR);
//And the SurfaceTexture
VideoSurfaceTexture = new SurfaceTexture(videoTextureID);
We can then set up a MediaPlayer and pass it a Surface that we create from the SurfaceTexture we just made:
mMediaPlayer = new MediaPlayer();
try
{
  AssetFileDescriptor afd = parentMainActivity.getAssets().openFd("bbb.mp4");
  mMediaPlayer.setDataSource(afd.getFileDescriptor(), afd.getStartOffset(), afd.getLength());
  mMediaPlayer.setSurface(new Surface(VideoSurfaceTexture));
  mMediaPlayer.setLooping(true);
  mMediaPlayer.prepare();
}
catch (IOException e){
  throw new RuntimeException("Error opening video file");}
We will need just a simple pair of shaders. Vertex:
precision mediump float;

attribute vec4 a_Position;
attribute vec4 a_TextureCoordinate;

uniform mat4 u_TextureTransform;
uniform mat4 u_MVP;

varying vec2 v_TextureCoordinate;

void main() {
   v_TextureCoordinate = (u_TextureTransform * a_TextureCoordinate).xy;
   gl_Position = u_MVP * a_Position;
}
and fragment (notice it's a samplerExternalOES not the usual sampler2D):
#extension GL_OES_EGL_image_external : require
precision mediump float;

uniform samplerExternalOES videoTexture;

varying vec2 v_TextureCoordinate;

void main () {
    vec4 color = texture2D(videoTexture, v_TextureCoordinate);
    gl_FragColor = color;
}
We will need some coordinates, virtualScreenVetrexCoords defines the screen shape (and will be scaled by MVP matrix to the correct aspect ratio). The different videoTextureCoords are the key part to displaying stereo video as it allows us to define the source part of the video we will display (top half, bottom half or all of it), you will need to adjust these if your video is side by side:
private static float virtualScreenVetrexCoords[] = {
  -1,  1, 0,
  -1, -1, 0,
  1, -1, 0,
  1,  1, 0 };

private static short virtualScreenVetrexIndicies[] = {
  0, 1, 2,
  0, 2, 3};

//Non Stereo
private float videoTextureCoords[] = {
  0.0f, 1.0f, 0.0f, 1.0f,
  0.0f, 0.0f, 0.0f, 1.0f,
  1.0f, 0.0f, 0.0f, 1.0f,
  1.0f, 1.0f, 0.0f, 1.0f};
//Top Image
private float videoTextureCoordsTop[] = {
  0.0f, 0.5f, 0.0f, 1.0f,
  0.0f, 0.0f, 0.0f, 1.0f,
  1.0f, 0.0f, 0.0f, 1.0f,
  1.0f, 0.5f, 0.0f, 1.0f};
//Bottom Image
private float videoTextureCoordsBottom[] = {
  0.0f, 1.0f, 0.0f, 1.0f,
  0.0f, 0.5f, 0.0f, 1.0f,
  1.0f, 0.5f, 0.0f, 1.0f,
  1.0f, 1.0f, 0.0f, 1.0f,};
These are then loaded into Java FloatBuffers in the usual way but the three videoTextureCoords are kept in an array I have called textureCoordsBuffer (see complete class).
This is the render code. Notice updateTexImage() and getTransformMatrix(). getTransformMatrix() retrieves a matrix that is used to transform the texture coordinates. The video may not effectively fill the whole texture and by applying this transform in the vertex shader we can use normalised texture coordinates. Notice also that we use the videoTextureCoords that corresponds to the current eye being rendered (textureCoordsBuffer[eye]).
public void render(int eye)
{
  VideoSurfaceTexture.updateTexImage();
  VideoSurfaceTexture.getTransformMatrix(videoTextureTransform);

  GLES20.glUseProgram(shaderProgram);

  GLES20.glActiveTexture(GLES20.GL_TEXTURE0);
  GLES20.glBindTexture(GLES11Ext.GL_TEXTURE_EXTERNAL_OES, videoTextureID);

  GLES20.glUniformMatrix4fv(textureTranformParam, 1, false, videoTextureTransform, 0);
  GLES20.glUniformMatrix4fv(MVPParam, 1, false, MVPMatrix, 0);

  GLES20.glEnableVertexAttribArray(vertexCoordsParam);
  GLES20.glVertexAttribPointer(vertexCoordsParam, 3, GLES20.GL_FLOAT, false, 0, screenVetrexCoordsBuffer);

  GLES20.glEnableVertexAttribArray(textureCoordsParam);
  GLES20.glVertexAttribPointer(textureCoordsParam, 4, GLES20.GL_FLOAT, false, 0, textureCoordsBuffer[eye]);

  GLES20.glDrawElements(GLES20.GL_TRIANGLES, virtualScreenVetrexIndicies.length, GLES20.GL_UNSIGNED_SHORT, screenVetrexIndiciesBuffer);
}
We call the above function from onDrawEye() and we must pass it the current eye number, the Cardboard SDK uses the ints 1 and 2 to represent each eye.
float[] videoMVP =  new float[16];
Matrix.multiplyMM(videoMVP, 0, view, 0, videoScreenModelMatrix, 0);
Matrix.multiplyMM(videoMVP, 0, perspective, 0, videoMVP, 0);
mVideoRenderer.setMVPMatrix(videoMVP);
The model matrix videoScreenModelMatrix was created in the usual way. We set the aspect ratio here as the screen shape is defined as a square in virtualScreenVetrexCoords.
//Set the size and placement of the virtual screen.
Matrix.setIdentityM(videoScreenModelMatrix, 0);
float screenSize=2; //Virtual screen height in meters.
float aspectRatio=16f/9f; //Image will be stretched to this ratio.
Matrix.scaleM(videoScreenModelMatrix, 0, screenSize, screenSize/aspectRatio, 1);
Matrix.translateM(videoScreenModelMatrix, 0, 0.0f, 0.0f, -4.0f);
A complete class, which is part of a full working demo of this code can be found on GitHub. This app plays the first minute of Big Buck Bunny in 3D and allows you to switch between 3D & 2D video by pulling the Cardboard trigger.
Further Reading
Playing video with effects using OpenGL on Android by Jernej Virag.
Stack Overflow question: Android. How play video on Surface(OpenGL).
Both of these relate to playing 2D videos in OpenGL and were useful in the writing of this code.
Comments
Show Comments (Disqus).
Matthew Wellings - Blog

Depth Peeling Pseudo-Volumetric Rendering 25-Sept-2016
Depth Peeling Order Independent Transparency in Vulkan 27-Jul-2016
The new Vulkan Coordinate System 20-Mar-2016
Improving VR Video Quality with Alternative Projections 10-Feb-2016
Playing VR Videos in Cardboard Apps 6-Feb-2016
Creating VR Video Trailers for Cardboard games 2-Feb-2016
Playing Stereo 3D Video in Cardboard Apps 19-Jan-2015
Adding Ray Traced Explosions to the Bullet Physics Engine 8-Oct-2015